Building and deploying with TeamCity and Octopus Deploy – part 5 of 5
Scroll DownConfiguring Octopus Deploy
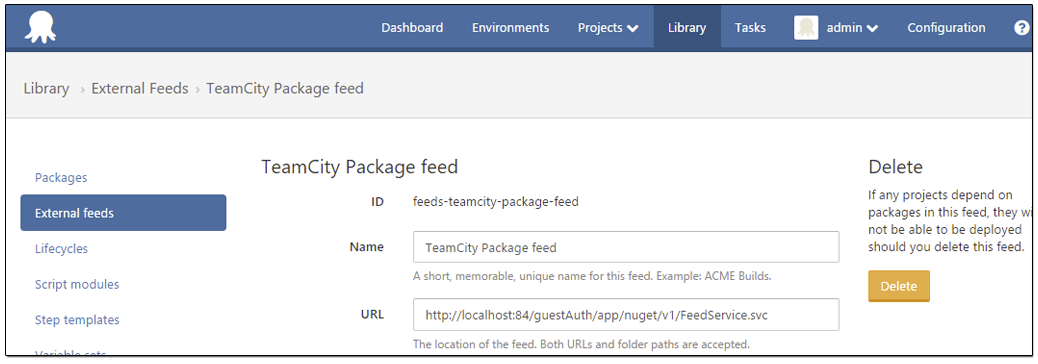
1. Start by adding an new external feed. Navigate to** Library -> External feeds -> Add feed**. I’m naming the feed for** “TeamCity Package feed”, and the url is http://localhost:84/guestAuth/app/nuget/v1/FeedService.svc**. As you maybe have noticed this is the feed we enabled earlier in TeamCity, and this is the feed we are going to use to fetch artifacts from TeamCity and the Octo project. For the sake of simplicity I’m using the guest login, but you could also have used an authenticated user, provided with Username and Password in the input fields below.
2. Add a new default lifecycle; Library -> Add lifecycle.
3. Now move on to Environments and add two environments; Test and **Prod. **In Octopus, an environmentis a group of machines that you will deploy to at the same time; common examples of environments are Test, Acceptance, Staging or Production. In bigger developer environments it is normal to let one machine represent one environment. In this example we are using both environments on the same machine.
4. Add one Deployment target for the Test environment and one for the Prod environment. For the Test environment add the following:
- Display name: web-test-01
- Environments: Test
- Roles: db-server, web-server
- Style: Listeting Tentacle
- Thumbprint: You can find the thumbprint in the Tentacle Manger
- Tentacle URL:** https://localhost:10933 (this is the default suggestion I’m using, but this could be something else in your installation)**
For the Dev environment add the following Deployment Target:
- Display name: web-prod-01
- Environments: Prod
- Roles: db-server, web-server
- Style: Listeting Tentacle
- Thumbprint: You can find the thumbprint in the Tentacle Manger
- Tentacle URL:** https://localhost:10933 (this is the default suggestion I’m using, but this could be something else in your installation)**

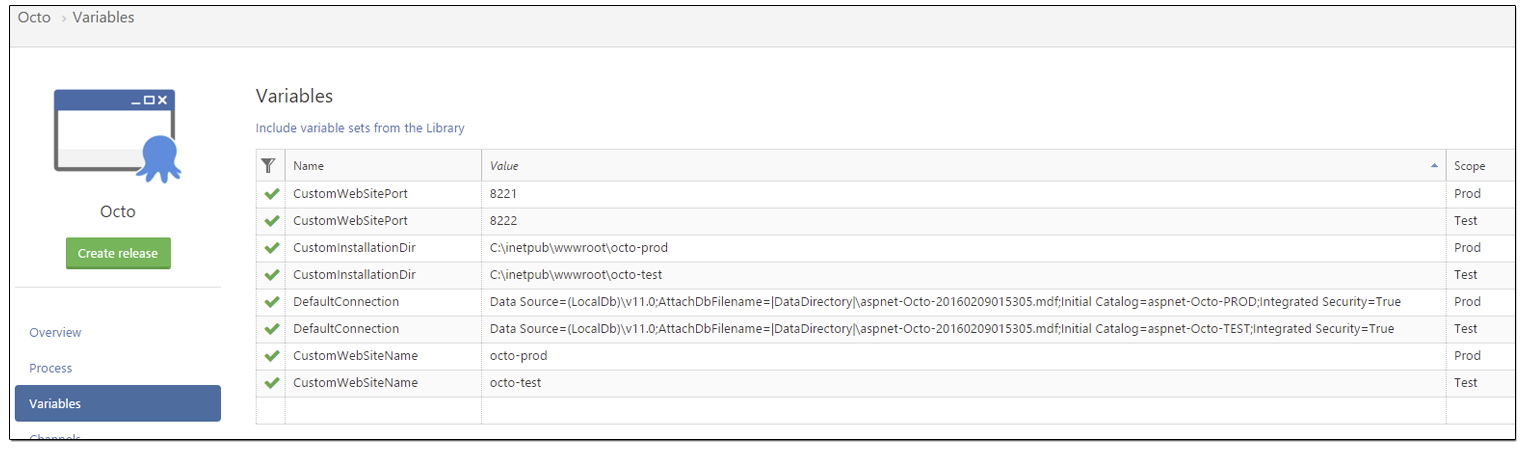
5. Go to the Projects menu and add new Project. I’m calling my project for Octo. Add the following variables to the project:
6. Navigate to Process and add the step “Deploy a Nuget package” and call it for “Deploy Web site”. Than add the following parameters:
- Runs on target roles: web-server and** db-server**.
- Nuget feed: TeamCity Package feed
- NuGet package ID: Octo
- Download options: The first option
- Install to: #{CustomInstallationDir}
- Purge: Checked
- Configuration Variables: Checked
- XML transforms: Checked
- Web Site: Checked
- Web Site name: #{CustomWebSiteName}
- Relative home directory: Leave empty
- Application pool name: #{CustomWebSiteName}
- .NET CLR version: v4.0
- Identity: Application Pool Identity
- Bindings: - Protocol: Http
- Port: #{CustomWebSitePort}
- IP Address: 127.0.0.1
- Host name: #{CustomWebSiteName}
- Authentication modes:Cheked (Enable Anonymous authentication)
- Environments: Test, Prod

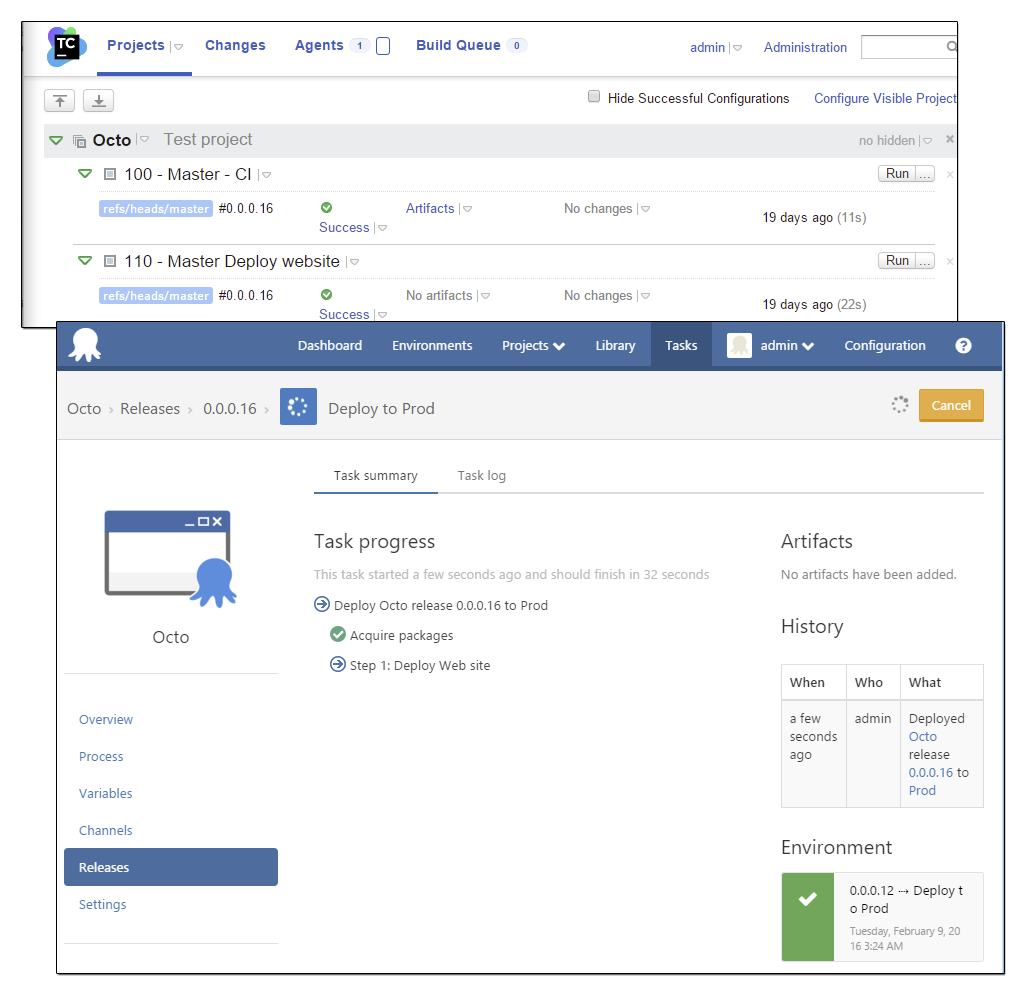
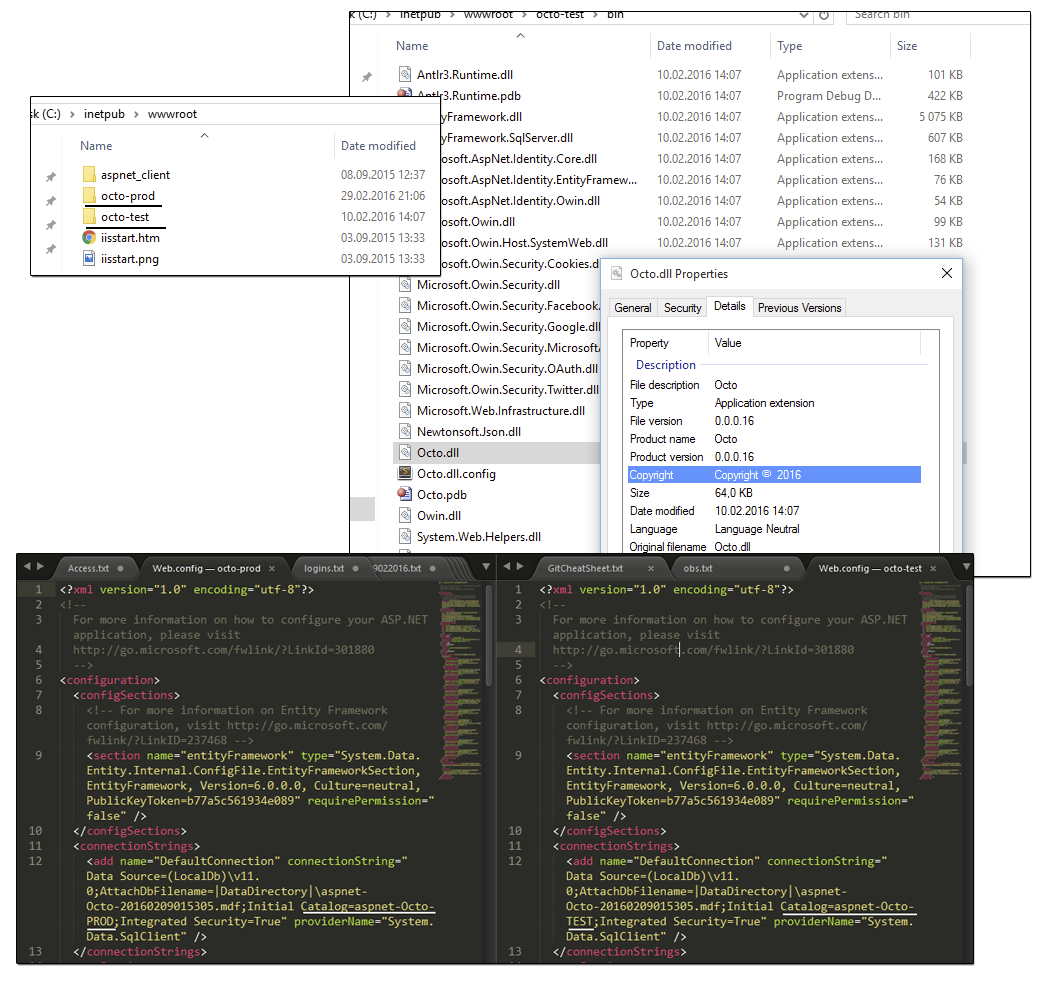
7. At this moment the configuration part is finished. You can make some changes to the code and push the commits to the remote repo. The build should automatically start in TeamCity and the deployment should be processed in the Octopus. If everything goes green the deployment is working as expected. Another way to verify the deployment, is by opening the wwwroot directory. There you should find two new folders; octo-prod and octo-test.** **The folders should contain a mvc webapp which also include web.config file. In the config files there is a connection string with environmentname in the database name. The assemblies should also have been versioned.
Comments