Configuring TeamCity
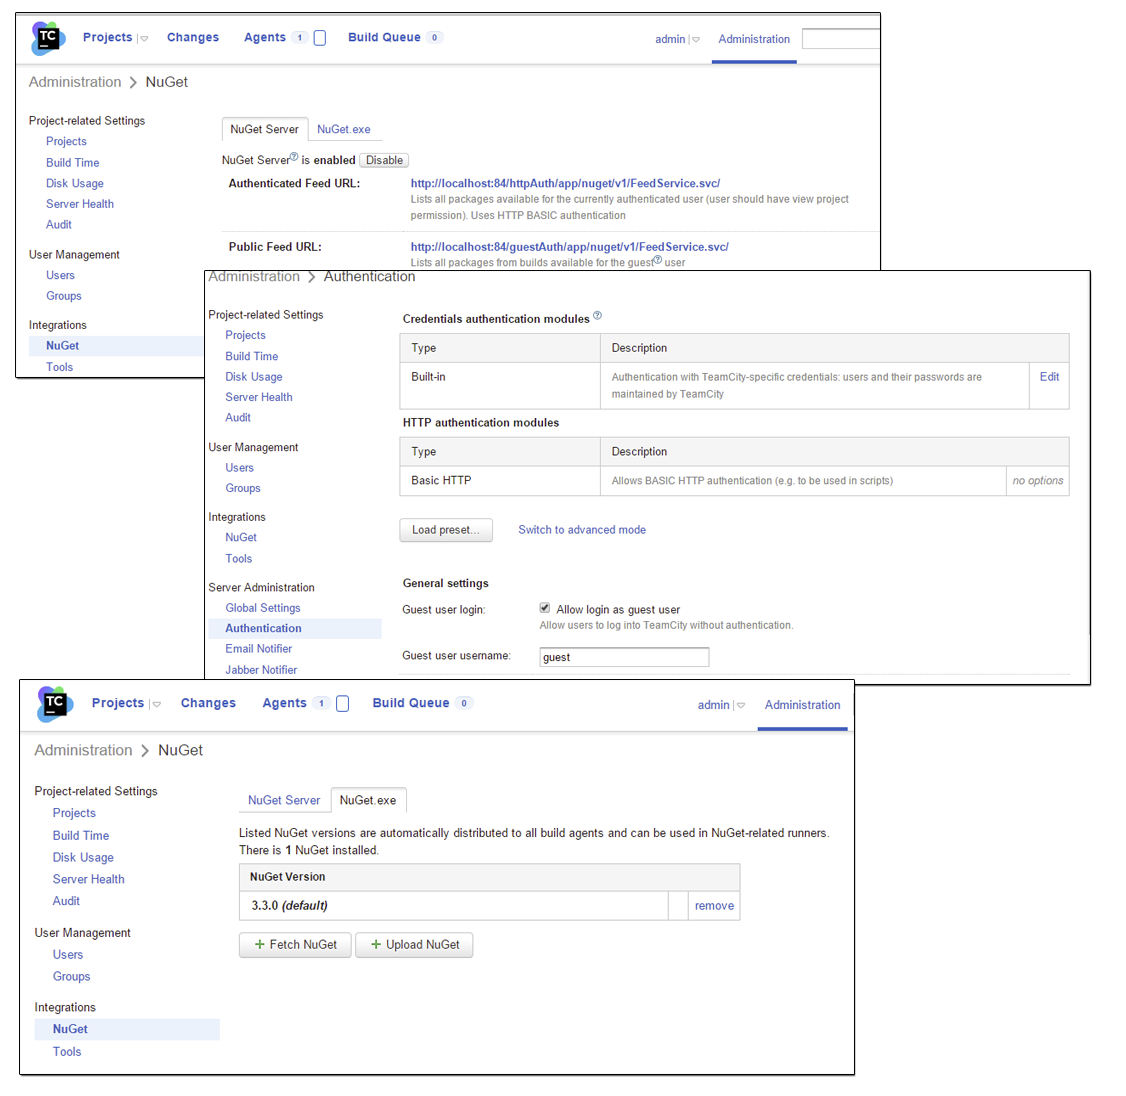
1. Enable Nuget Feed in TeamCity: Administration -> Nuget. Enable both the Authenticated feed and the Public feed. To enable the public feed the Guest user login must be allowed. Also get the lates Nuget version.
2. Download and install Octopus TeamCity plugin. Stop TeamCity services, and move your Octopus plugin to the following directory:** “D:\TeamCity\plugins”. **Now start your TeamCity services again, and the plugin will be installed automatic.
3. Now create a user on Bitbucket and create a Git repository. We are naming it for Octo.
4. Create a Web Application (I’,m using MVC) in Visual Studio based on .NET Framework 4.6 and map it with your Bitbucket repo. Add the unit test project to it as well. Following the instructions provided in Bitbucket should make this a quite easy process.
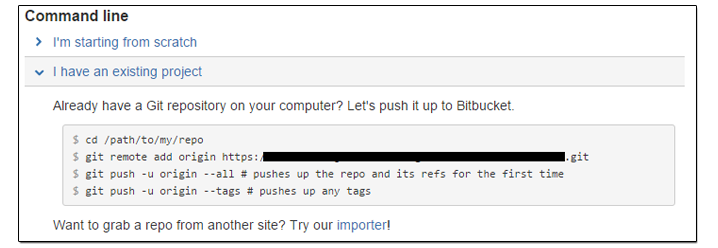 bitbucket setup
5. In this example we will be using one git branch, master, that will be build and deployed once, but promoted to different environments. This is where Octopus Deploy have it strengths.
6. Start by creating a new project in TeamCity, called Octo. Now add VCS root to that project. Surprisingly enough we will be using the newly created repo from Bitbucket; octo.git
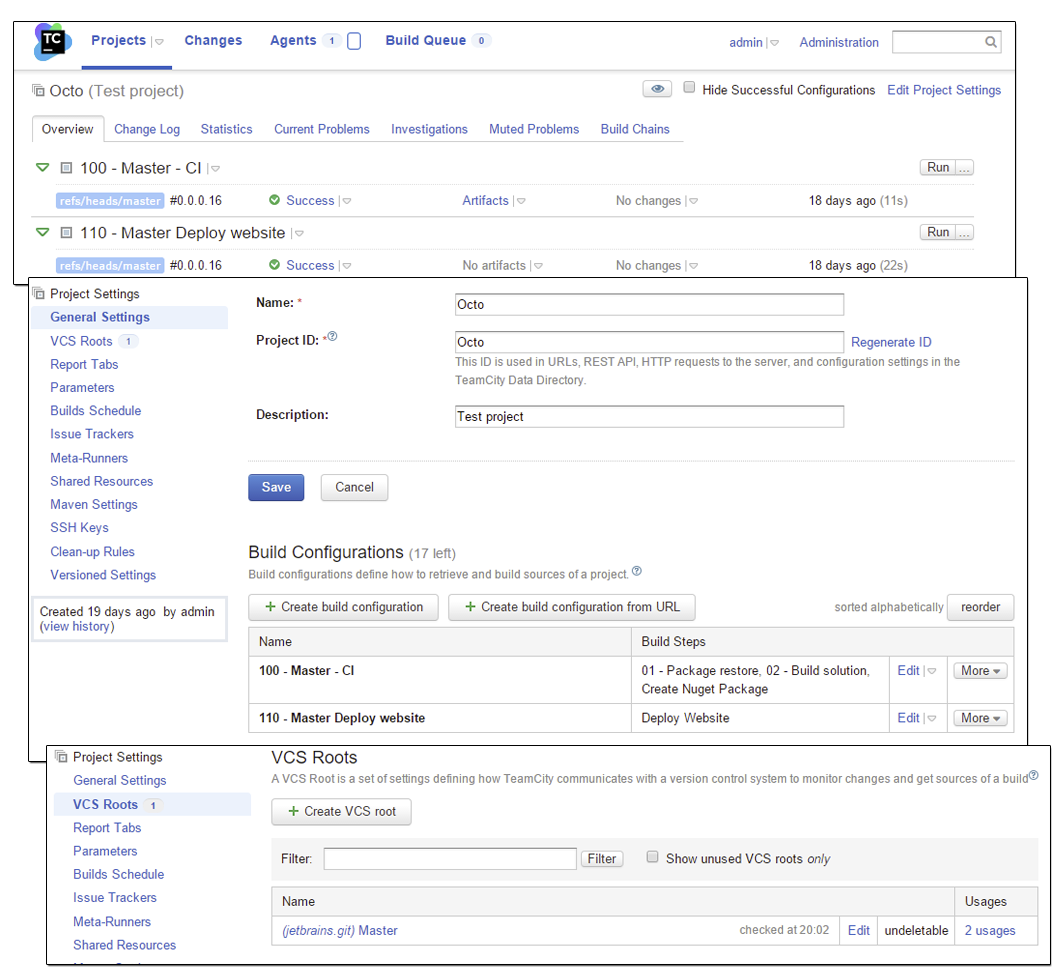 teamcity config
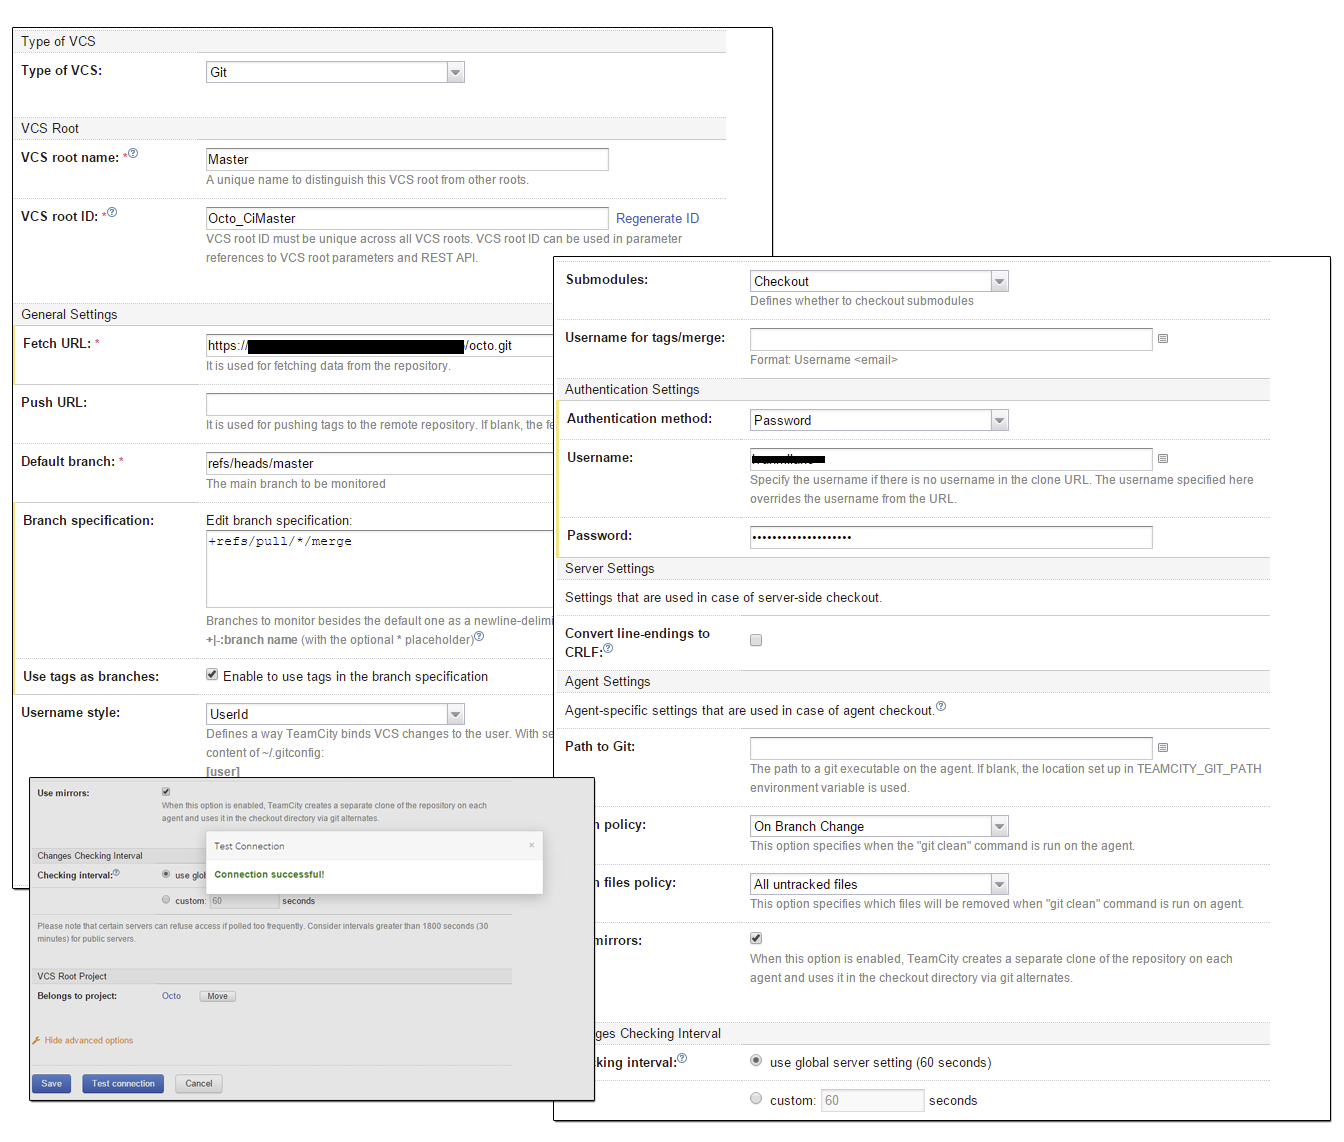 teamcity config
7. Add two build configurations to your TeamCity Octo project, one for building the project and creating artifacts, and one for deploying the artifacts to Octopus. I’m naming my builds for “100 – Master CI” and** “110 – Master Deploy website”**. The naming convention is inspired by Roy Osherove talk about beautiful builds
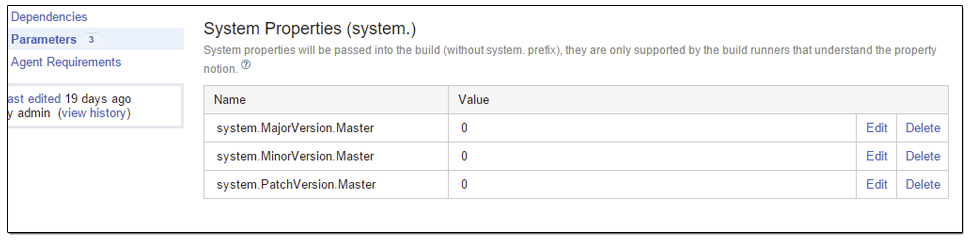
8. Move to your “100 – Master CI” build configuration and three parameters: system.MajorVersion.Master, system.MinorVersion.Master and **system.PathVersion.Master. **These parameters will be used to create a buildnumber.
 teamcity config
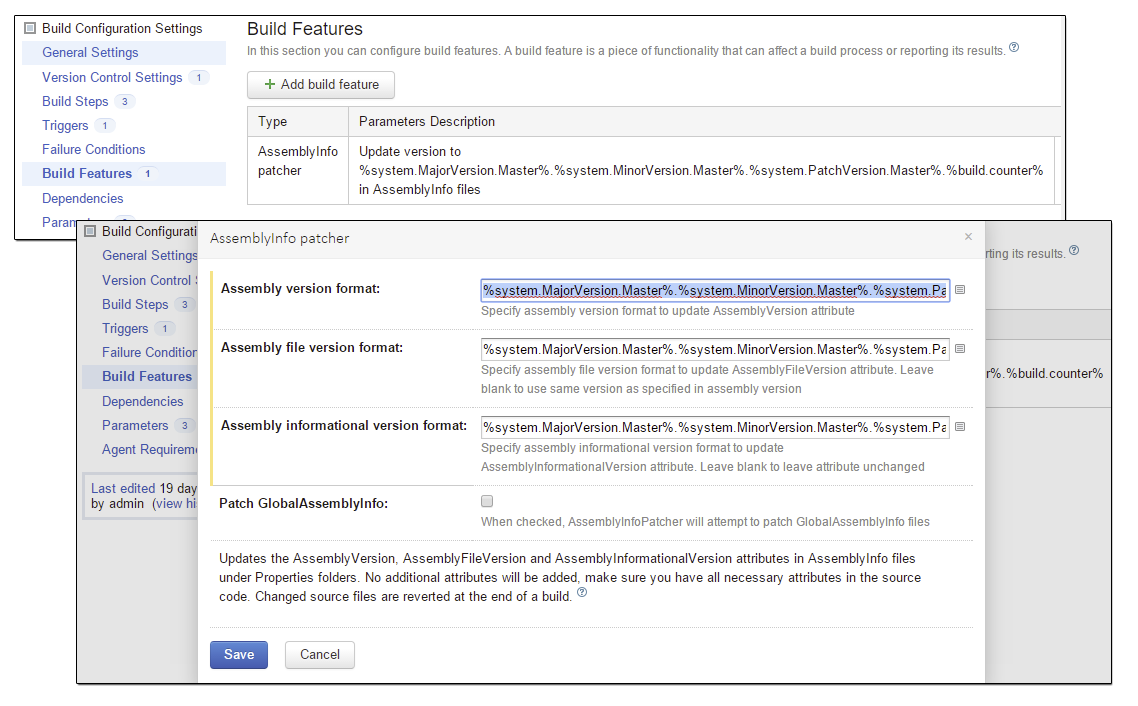
9. Under Build Features add a new build feature: “Assembly Info patcher”. Use the parameters created in prevous step. Use the same format in all three input fields:** %system.MajorVersion.Master%.%system.MinorVersion.Master%.%system.PatchVersion.Master%.%build.counter%. Add this inputstring in the “Build number format” field underneath “General Settings”** menu as well.
 teamcity config
10. Create** VCS trigger** underneath “Triggers” menu. Whenever a push is performed on the git repo this is the trigger that starts the build process.
 teamcity config
11. Attach the created VCS Root to the configuration.
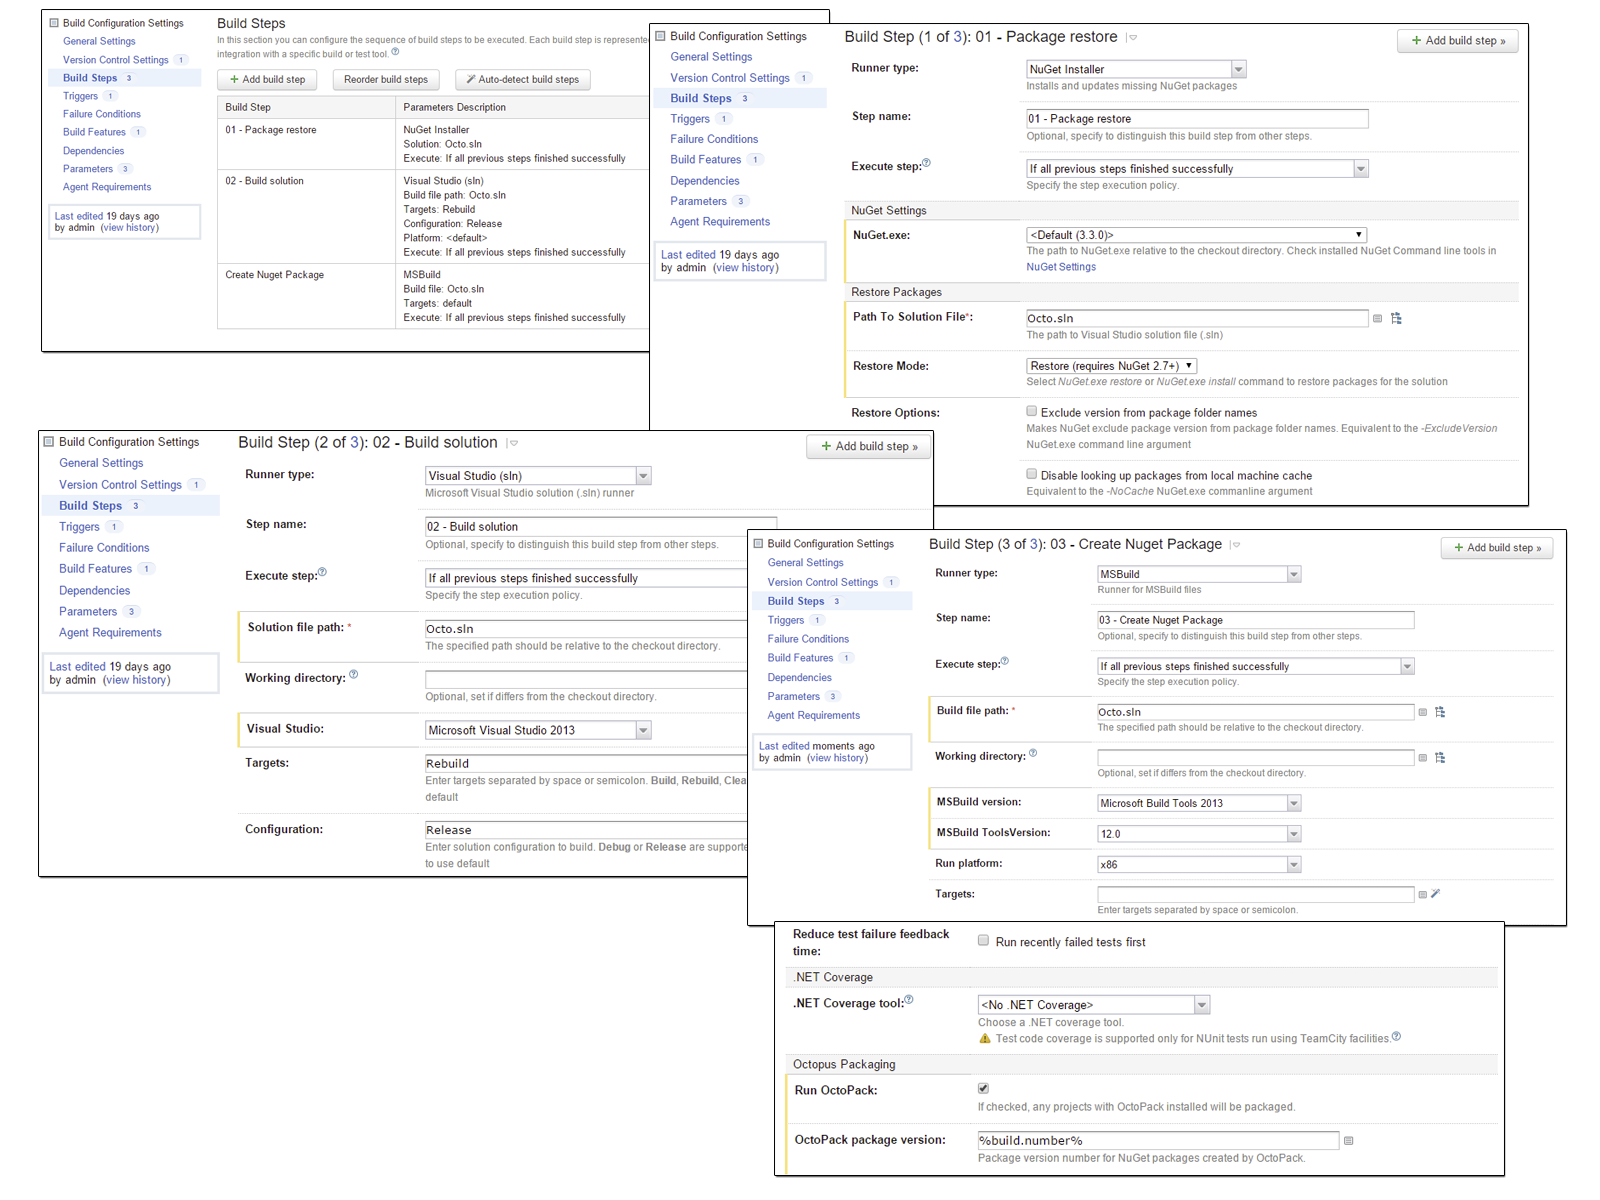
12. Now add three build steps to the configuration; “01 – Package restore”, “02 – Build solution” and** “03 – Create Nuget Package”.** Use the options provided in the screen dump below. In the build step 3 there is section for Octopus. This is actually the plugin we installed earlier.
 teamcity config
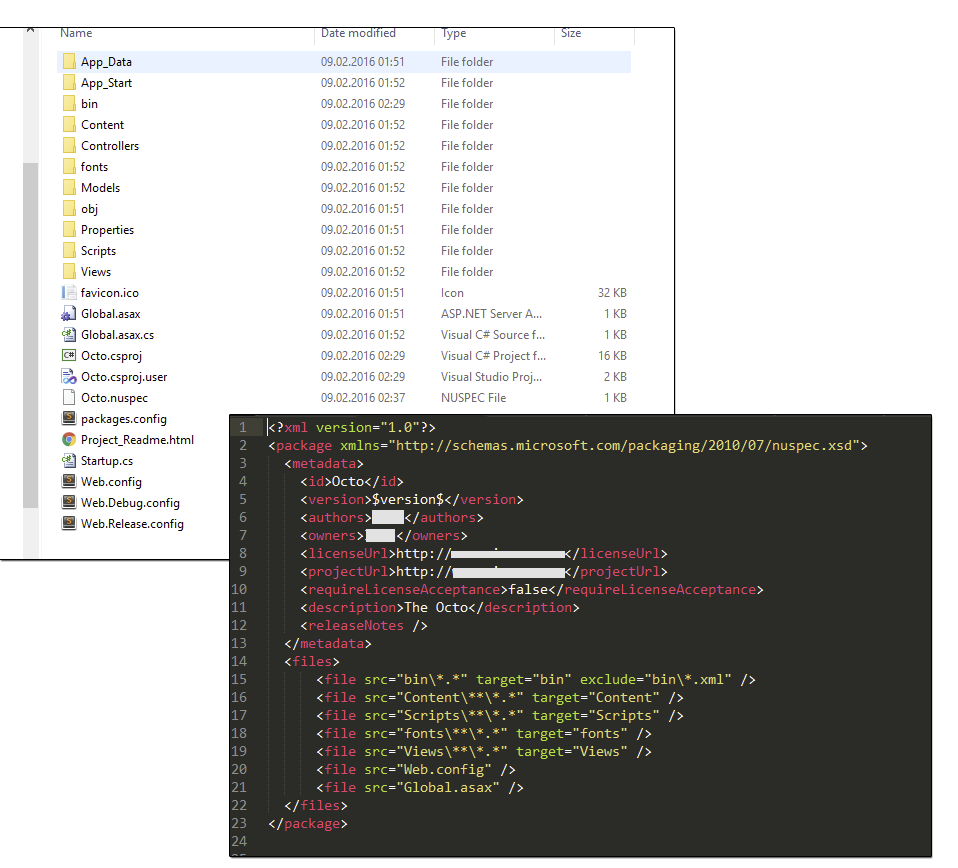
13. Open the Visual Studio project directory and add a new empty file called Octo.nuspec. A .nuspec file is a manifest that uses XML to describe a package and must exist, otherwise no artifacts will be created. Open the file and add lines as proposed:
 teamcity config
14. Open your Visual Studio project, navigate to “Manage NuGet Packages” and add OctoPack to your solution. Push all your solution changes to remote.
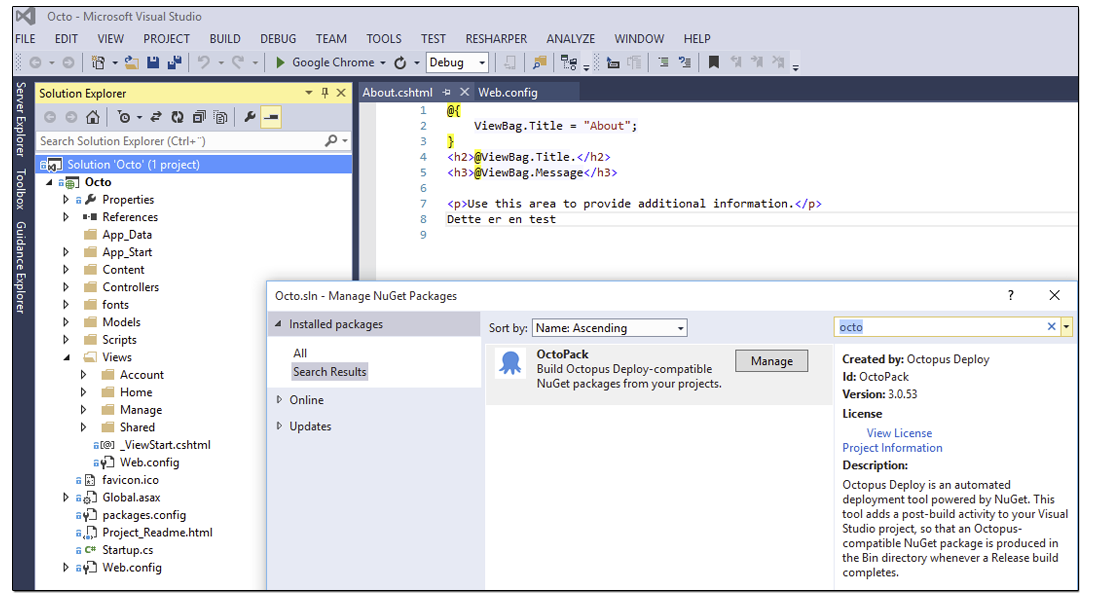 visual studio octo nuget pack
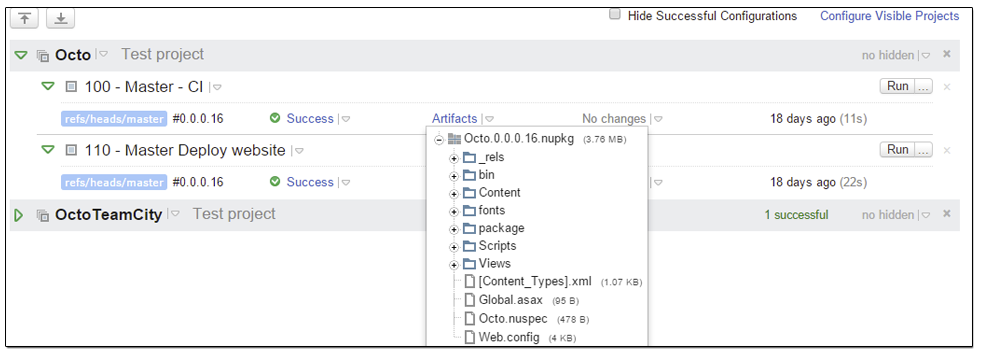
15. At this moment You should have a valid build setup. You can now try to run, and hopefully you will see that some artifacts are generated.
16. Now open “110 – Master Deploy website” configuration and navigate to “General Settings”. In** “Build number format”** field add the following input: %dep.Octo_100MasterCI.build.number%
17. Underneath “Triggers” menu add “Finish Build Trigger” trigger and use build configuration “Octo :: 100 – Master – CI”. This is the previous build configuration that will start this one.
18. Underneath “Dependencies” add one Snapshot Dependency and one Artifact Dependency where both depends on **100 – Master – CI”. ** In the Artifacts rules field for Artifact Dependency add the following *.%build.number%.nupkg
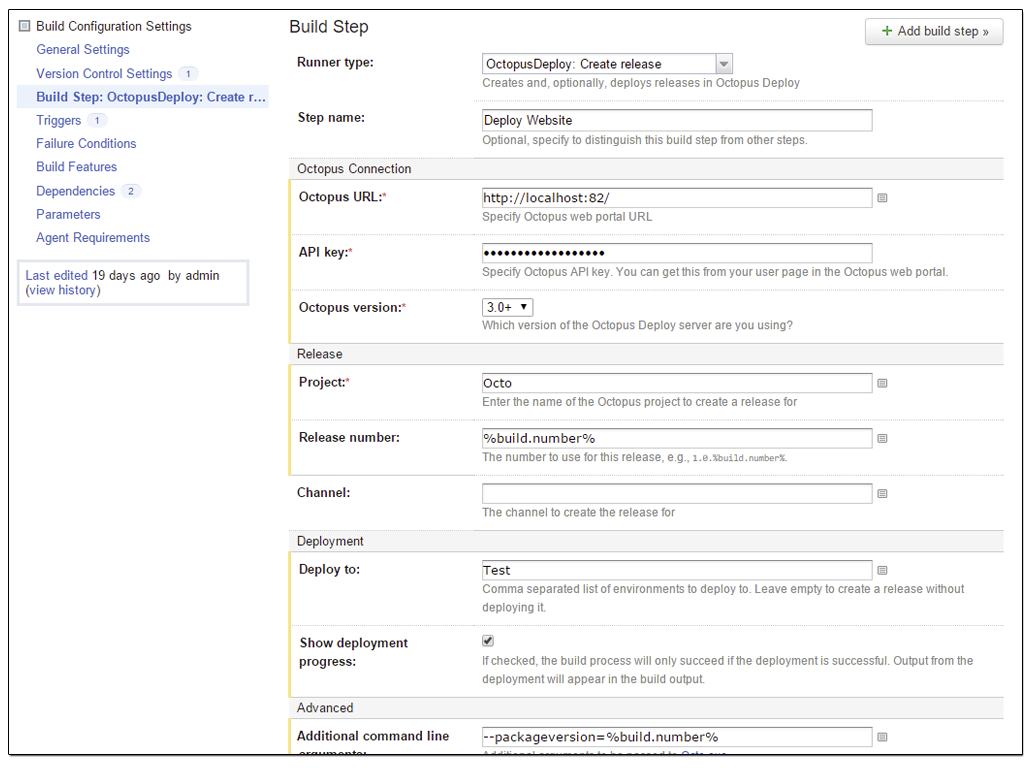
19. For this build configuration there is only one build step. Add** “OctopusDeploy: Create release”** as Runner type. In the Octopus URL add url to the Octopus Web installed in previous step (should be localhost:82). When asked for the API key, it can be generated in the Octopus web portal; admin -> profile -> API Keys. In the “Deploy to” field add Test, as we will create test environment in Octopus that this deploy will use. As additional command line arguments add the following:** –packageversion=%build.number%**
 teamcity config
20. At this moment TeamCity should be properly configured. You can now try to add some changes to your code, push the changes to Bitbucket. The build should automatically start after some time. Both build configuration will run, but the last one, “110 – Master Deploy website” will not do much since the Octopus Server is not set up. So go ahead and start configuring the Octopus Server.
Comments